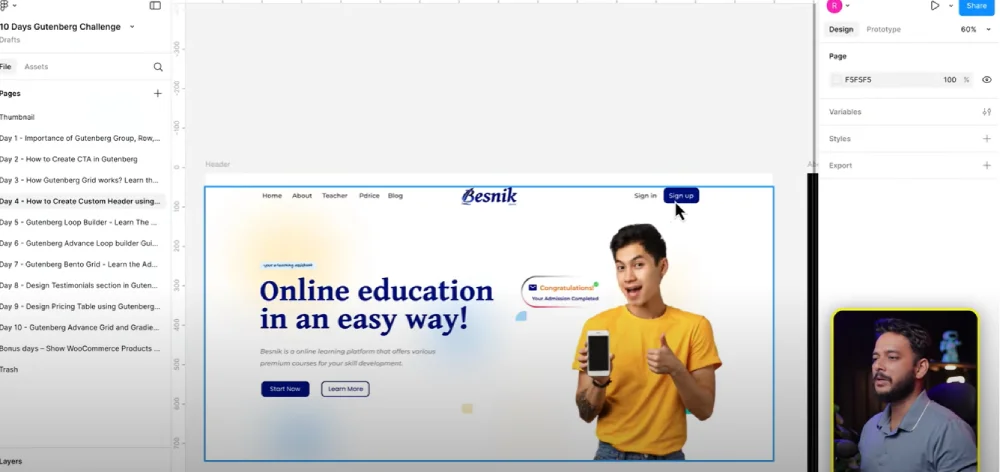
Designing a custom header in WordPress doesn’t have to be complicated — especially if you’re using Gutenberg’s Full Site Editing (FSE) capabilities. In this tutorial (Day 4 of the Gutenberg Challenge Series), we’ll walk you through how to create a fully customized header with a menu, logo, and buttons – all using default Gutenberg blocks.
By the end of this guide, you’ll know how to structure your header, style it, and even add drop-down menus without relying on a page builder or third-party plugin.
What You’ll Learn
✅ How to create a header using Gutenberg FSE
✅ The difference between Group, Row, and Navigation blocks
✅ How to add custom menus, logos, and buttons
✅ How to style your header for a polished look
✅ How to create drop-down menus inside Gutenberg Navigation
Accessing the Site Editor
First, you need a block theme (like Twenty Twenty-Five) since classic themes won’t work with FSE.
1️⃣ In your WordPress Dashboard, go to Appearance → Editor (Site Editor).
2️⃣ Click on Edit Header.
3️⃣ Remove the default header elements if needed (clean slate!).
💡 Tip: Only block themes support Full Site Editing. If you’re unsure whether your theme supports FSE, check WordPress.org’s Block Theme Directory.
Creating a Navigation Menu
✅Add a Navigation Block.
✅Click the three-dot menu → Create new menu.
✅Add links for:
1️⃣Home
2️⃣About Us
3️⃣Services
3️⃣Blog
👉 You can add custom links or existing pages.

Adding Your Logo
✅ Add a Site Logo Block inside your header.
✅ Upload your PNG/SVG logo from the Media Library.
✅ Adjust the logo size (e.g., 140px) for the best fit.
Adding Buttons (Sign In & Sign Up)
✅ Add two Button Blocks:
1️⃣Sign In – Transparent background, black text.
2️⃣Sign Up – Solid blue background (#yourbrandblue), white text.
Styling Tips:
✅ Set padding: Top/Bottom: 10px | Left/Right: 15px
✅ Border Radius: 10px for smooth, rounded corners.
Aligning Your Header Layout
✅ Select the Menu, Logo, and Buttons.
✅ Wrap them inside a Row Block.
✅ Set alignment to Wide Width and justification to Space Between for perfect spacing.
✅ You now have a clean, professional header layout!

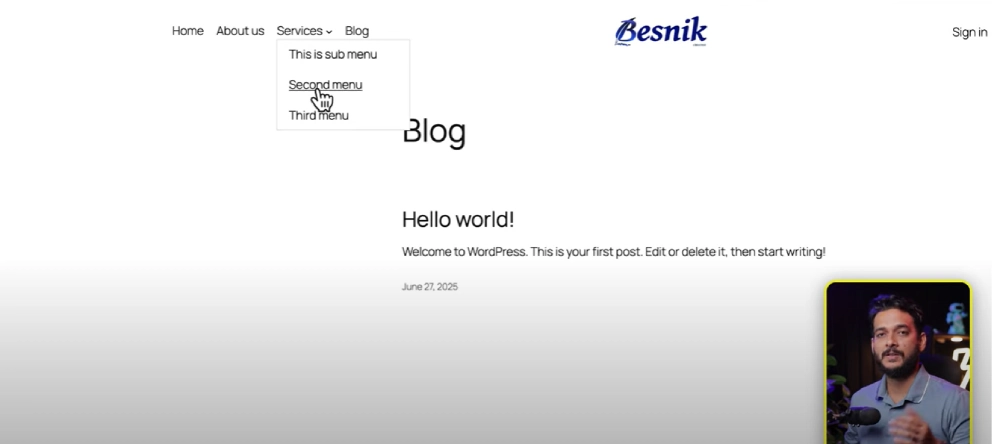
Adding a Drop-Down Menu
Gutenberg Navigation makes submenus simple:
1️⃣ Click on any menu item → Submenu.
2️⃣ Add your submenu items (e.g., “Team”, “Portfolio”, “Contact”).
3️⃣ Save and reload the site — you’ll see your dropdown live!
Responsive Issues (and Solutions)
Currently, Gutenberg menus may break on mobile.
✅Use custom CSS for better styling (tutorial coming soon!).
✅ Or install a helper plugin like Block Visibility for more control.
Homework Challenge
We only built the header in this tutorial. The hero section is your challenge!
💬 Share your work in our Facebook Group and get feedback from other designers and WordPress pro
Helpful Resources
✅📘 Official Gutenberg Docs: wordpress.org/gutenberg
✅🎨 Free Logo Tools: canva.com
✅🎥 Watch the : ( Full Tutorial )
All Video: 10 days Gutenberg Challange
✅ Day 1: Mastering Gutenberg Group, Row, Stack & Grid Blocks for WordPress Layout
✅ Day 2: How to Create CTA in Gutenberg while exploring Row, Stack, Group & Cover block.
✅Day 3: How Gutenberg Grid works? Learn the Basic of Gutenberg Grid with Stack, Row, Group
✅ Day 4: How to Create a Custom Header & Menu using Gutenberg FSE Blockhttps://youtu.be/jwx9Aacp3so?si=Yli2iQDotqHASNO-
✅Day 5: Gutenberg Loop Builder Explained – Display Blog Posts | Custom posts with Ease
✅Day 6: Gutenberg Loop builder advance design Guide that you should know before using it!
✅Day 7: Gutenberg Bento Grid layout Learn the Advance Gutenberg grid
✅Day 8: Design a Testimonials section in Gutenberg Block
✅Day 9: Design Pricing Table using Gutenberg no additional plugin require
✅Day 10: Discover the POWER of Gutenberg Gradient Style with Grid Layouts
✅Bonus Day 11: Gutenberg Advance Gradient Border Master class

