If you’ve been following our Gutenberg Section Design Challenge, welcome to Day 5! 🎉 In this tutorial, we’ll dive deep into one of the most powerful Gutenberg blocks in WordPress – the Loop Builder (a.k.a. Query Loop).
Whether you’re building news layouts, blog archives, or showcasing custom post types, the Loop Builder can handle it all — without writing a single line of code.
What is the Loop Builder?
The Loop Builder (or Query Loop block) is designed to dynamically fetch and display WordPress posts, pages, or even products from WooCommerce. It’s essentially your go-to tool for building blog archives or custom layouts.
In this beginner-friendly tutorial, we’ll:
✅ Install dummy posts to work with.
✅ Explore the basic Query Loop setup.
✅ Customize the layout step by step to match a design.
✅ Add key elements like featured images, dates, authors, and tags.
✅ Learn how to link posts dynamically.
Setting Up Dummy Content
Before starting, we need some content to display.
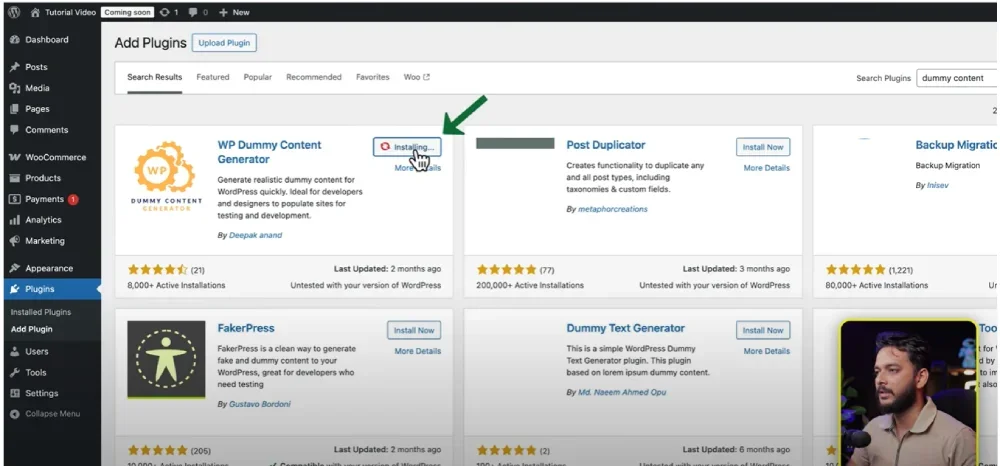
✅ Go to Plugins → Add New.
✅ Search for Dummy Content Generator by Deepak Anand.
✅ Install & Activate it.
✅ Generate 15 dummy posts (make sure to enable featured images).
👉 Tip: On real client projects, always request real content from your clients. Dummy content is only for testing.
Adding the Loop Builder
1️⃣ Create a new page in WordPress.
2️⃣ Search for Query Loop block (you can type /query loop in Gutenberg).
3️⃣ Choose a starter layout (e.g., “Title + Date” or start with a blank layout).
👉 Depending on your theme, you’ll see different prebuilt patterns.
Customizing the Layout
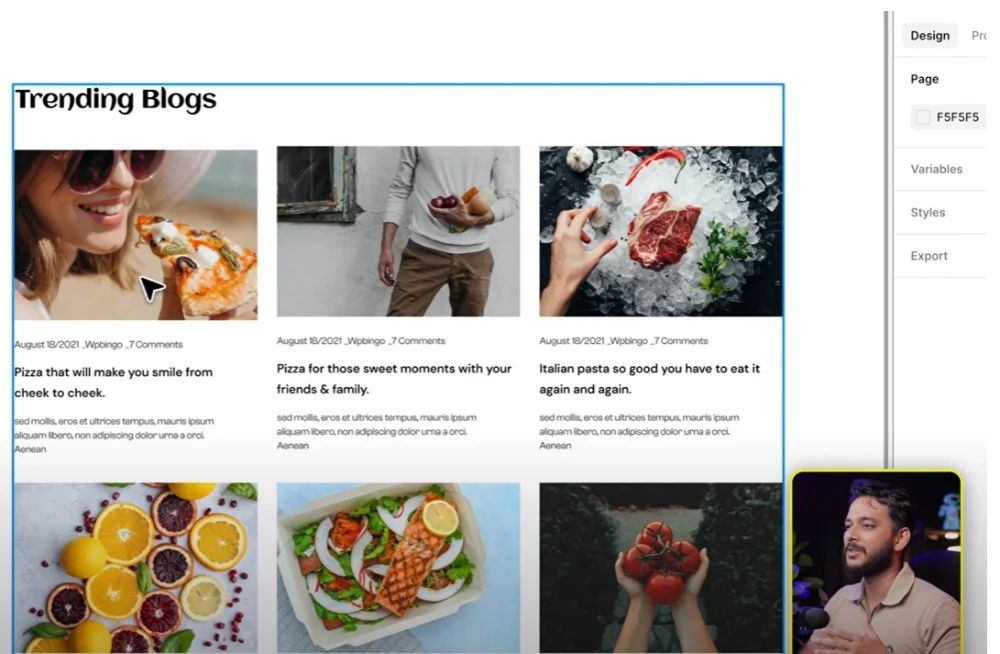
✅ Change the layout width to 1340px.
✅ Add a Featured Image block above the title.
✅ Add Date and Excerpt blocks.
✅ Group these elements for better control.
✅ Switch the Post Template to Grid View for a multi-column design.
Styling Tweaks:
✅ Set image height to 280px (and choose “Cover” for scale).
✅ Adjust font sizes: Title (20px, bold), Excerpt (16px).
✅ Limit excerpt to 18 words for a cleaner look.
✅ Add spacing: 35px between items.
Adding Extras
✅Add Author Name
✅ Add Tags and Categories
✅ Add a “Read More” button (optional)
✅ Link both the title and featured image to the single post page.
Exploring Loop Builder Settings
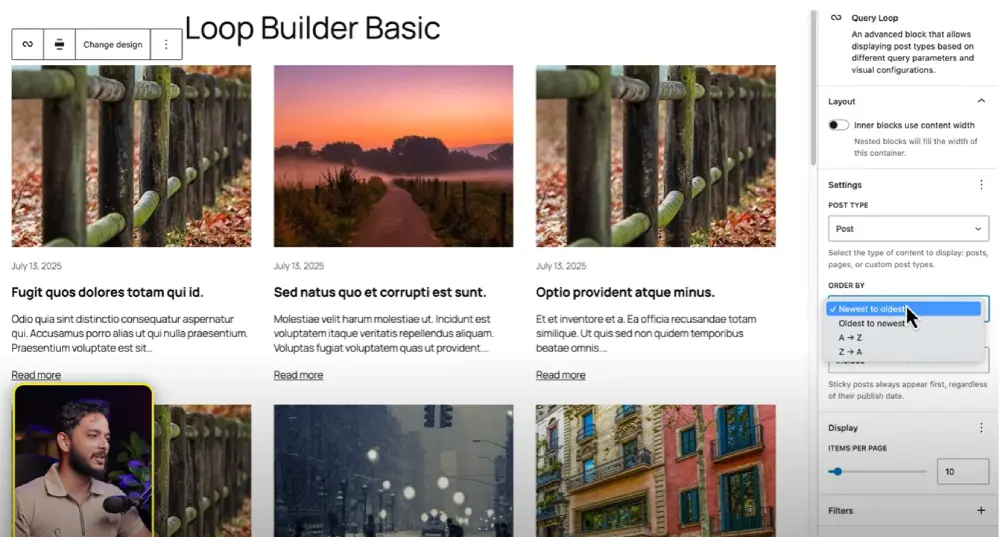
Inside the Query Loop settings, you can:
✅ Filter posts by category, author, or taxonomy.
✅ Display custom post types like products, portfolios, or events.
✅ Change post order (newest → oldest or alphabetical).
✅ Add or remove pagination.
👉 Future Tip: The Loop Builder isn’t limited to posts—you can use it for WooCommerce products or custom post types too.
Final Thoughts
The Gutenberg Loop Builder is one of the most essential tools for WordPress site builders. It gives you complete control over how you display dynamic content — all without plugins or custom code.
If you enjoyed this tutorial, don’t forget to check out our previous videos in the series and subscribe to Riad Mahmud’s YouTube Channel for more WordPress tips.
Resources Mentioned in This Tutorial
✅ Dummy Content Generator Plugin
✅ Learn More About Query Loop Block (Official WP Docs)
✅ Subscribe to Riad Mahmud’s YouTube Channel
All Video: 10 days Gutenberg Challange
✅ Day 1: Mastering Gutenberg Group, Row, Stack & Grid Blocks for WordPress Layout
✅ Day 2: How to Create CTA in Gutenberg while exploring Row, Stack, Group & Cover block.
✅Day 3: How Gutenberg Grid works? Learn the Basic of Gutenberg Grid with Stack, Row, Group
✅ Day 4: How to Create a Custom Header & Menu using Gutenberg FSE Blockhttps://youtu.be/jwx9Aacp3so?si=Yli2iQDotqHASNO-
✅Day 5: Gutenberg Loop Builder Explained – Display Blog Posts | Custom posts with Ease
✅Day 6: Gutenberg Loop builder advance design Guide that you should know before using it!
✅Day 7: Gutenberg Bento Grid layout Learn the Advance Gutenberg grid
✅Day 8: Design a Testimonials section in Gutenberg Block
✅Day 9: Design Pricing Table using Gutenberg no additional plugin require
✅Day 10: Discover the POWER of Gutenberg Gradient Style with Grid Layouts
✅Bonus Day 11: Gutenberg Advance Gradient Border Master class
