Are you ready to take your Gutenberg skills to the next level? In this post, we’ll walk through creating a Call-To-Action (CTA) section in WordPress using Gutenberg blocks like Row, Stack, Group, and Cover.
This guide is part of a 10-day Gutenberg series—so if you missed Day 1, you might want to check that out first. Today’s tutorial focuses on practical design implementation that works seamlessly across devices.
Start with a Figma Design
The design inspiration comes from a simple Figma layout.
✅ Don’t worry if you don’t have access to the same Figma file—you can use any placeholder image or even your own creative assets.
✅ The goal here is to practice section-building rather than designing a full website.
✅ Resource: Download free stock images from Pexels
Set Up Your WordPress Page
1️⃣ Go to your WordPress Dashboard → Pages → Add New.
2️⃣ Title the page “Day 2 – CTA Section.”
3️⃣ Keep in mind: For this series, we’re not configuring global typography or colors—each section will use its own styles.

Add a Background with the Cover Block
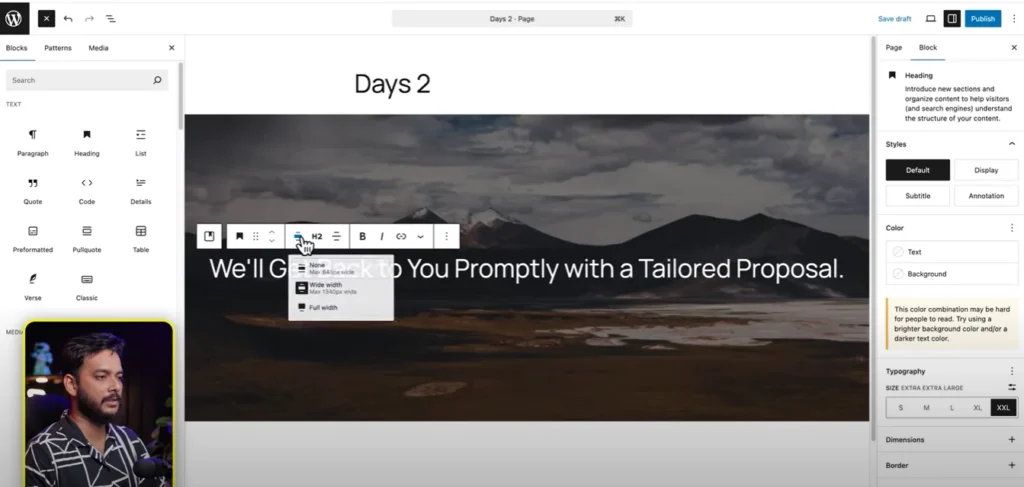
✅ Insert a Cover Block.
✅ Upload your chosen image (ideally 1920px wide for optimal quality and performance).
✅ Select Full Width to stretch the background across the entire browser window.
✅ Adjust opacity for a smooth overlay effect.
Why use the Cover Block?
Because it provides extra design control (overlay, alignment, responsiveness) compared to just setting a background image on a Group block.
Add Text & CTA Button
✅ Use a Heading block for your main title.
✅ Add a Paragraph block for supporting text.
✅ Insert a Button block for the CTA.nsert a Button block for the CTA.
Pro Tip:
Use slash commands (e.g., /heading) to add blocks faster.
🎯 Example CTA:
Organize Content with Stack & Group
✅ Select the button and paragraph → turn them into a Stack block.
✅ Adjust block spacing (instead of padding/margin) for cleaner responsive design.
✅ Wrap the whole section inside a Group block to control content width.rap the whole section inside a Group block to control content width.
👉 Important:
Disable “Inner blocks use content width” inside the Cover Block to allow custom widths for your Group.
Add Spacing Responsively
Instead of manually adding margins, use:
✅ Spacer blocks for consistent gaps
✅ Stack block spacing settings for controlled alignment
This ensures your section adapts perfectly to mobile and tablet screens.
Highlight Text & Add Styling
Want to emphasize key words?
✅ Select your text → click the highlight option → choose a custom color.elect your text → click the highlight option → choose a custom color.
✅ Adjust button colors, font sizes, and border radius (set to 0 for sharp corners).
Final Touch: Preview & Test Responsiveness
✅ Preview your page → check desktop, tablet, and mobile views.
✅ Everything should look seamless—no broken spacing, misaligned text, or oversized images.
📢 Join the Community
Share your version of this CTA section in our Facebook Group and get feedback from other WordPress designers. Collaboration makes learning faster and more fun!

Resources Mentioned
✅ Free Stock Images: Pexels
✅ WordPress Gutenberg Docs: wordpress.org/gutenberg
✅ Figma Design Tool: figma.com
All Video: 10 days Gutenberg Challange
✅ Day 1: Mastering Gutenberg Group, Row, Stack & Grid Blocks for WordPress Layout
✅ Day 2: How to Create CTA in Gutenberg while exploring Row, Stack, Group & Cover block.
✅Day 3: How Gutenberg Grid works? Learn the Basic of Gutenberg Grid with Stack, Row, Group
✅ Day 4: How to Create a Custom Header & Menu using Gutenberg FSE Blockhttps://youtu.be/jwx9Aacp3so?si=Yli2iQDotqHASNO-
✅Day 5: Gutenberg Loop Builder Explained – Display Blog Posts | Custom posts with Ease
✅Day 6: Gutenberg Loop builder advance design Guide that you should know before using it!
✅Day 7: Gutenberg Bento Grid layout Learn the Advance Gutenberg grid
✅Day 8: Design a Testimonials section in Gutenberg Block
✅Day 9: Design Pricing Table using Gutenberg no additional plugin require
✅Day 10: Discover the POWER of Gutenberg Gradient Style with Grid Layouts
✅Bonus Day 11: Gutenberg Advance Gradient Border Master class

