Welcome to Day 8 of the Gutenberg Challenge Series!
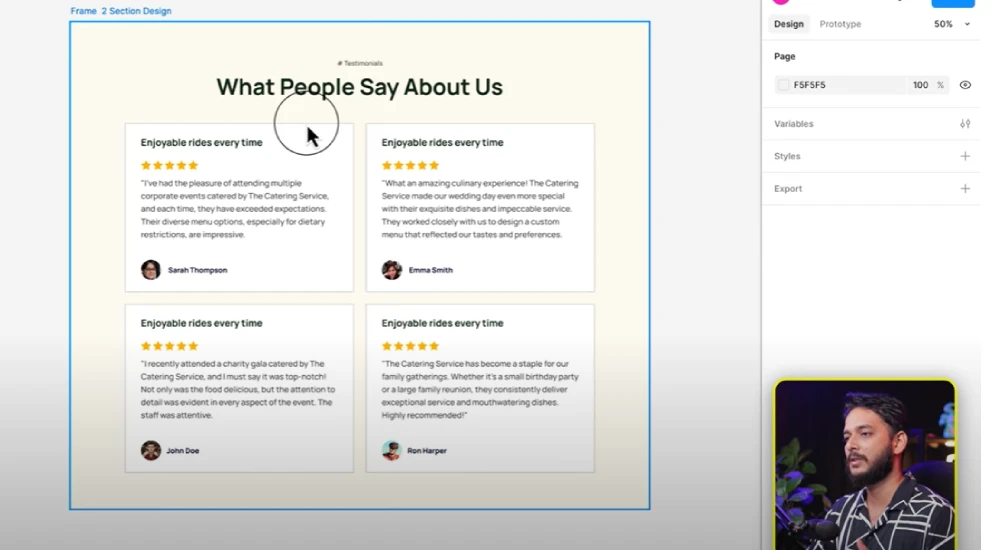
Today, we’re diving into creating one of the most important website sections – the Testimonials Section. A well-designed testimonial section adds trust and credibility to your website, and in this tutorial, you’ll learn how to craft one entirely with Gutenberg blocks — no coding required.
What You’ll Learn in This Tutorial
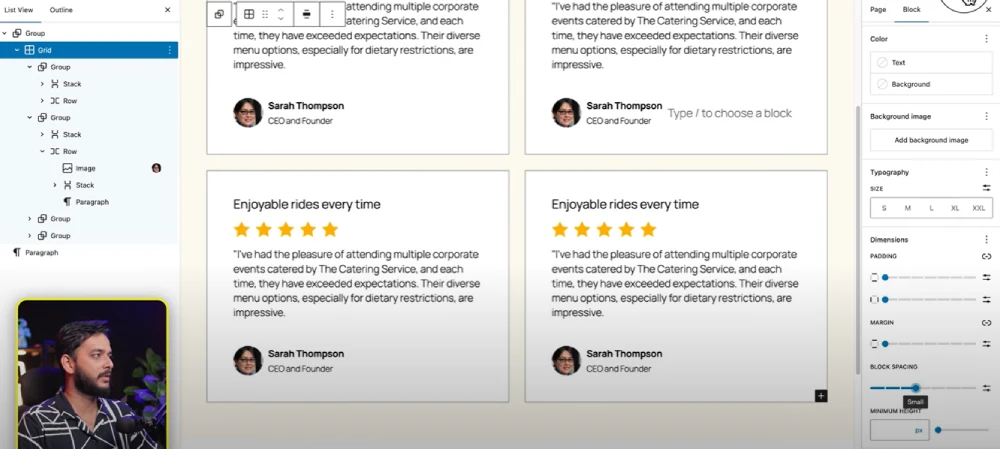
✅ How to structure testimonials using Grid, Group, Stack, and Row blocks.
✅ Adding star ratings and user images to make testimonials visually appealing.
✅ Using SVG icons in WordPress (and how to enable SVG upload support).
✅ Styling testimonials with padding, background colors, borders, and rounded corners.
✅ Tips to keep your Gutenberg layout clean and optimized for performance.

Steps to Create the Testimonial Section
1️⃣ Set Up the Base Section
- Add a Group block and set a background color (or a Cover block if using an image).
- Add padding (e.g., 30px) for breathing space.
2️⃣ Build the Testimonial Grid
- Insert a Grid block and set it to 2 columns (or more depending on your layout).
- Inside each grid cell, add a Group block for each testimonial.
3️⃣ Add Testimonial Content
- Inside each group:
- Add a Heading block for the testimonial title.
- Add star rating icons using SVG (requires an SVG plugin).
- Insert a Paragraph block for the testimonial text.
- Add the client’s name, designation, and image.
4️⃣ Enable SVG Support
By default, WordPress doesn’t allow SVG uploads.
- Install and activate the SVG Support plugin.
- Upload your SVG star icons and use them inside the testimonial design.
5️⃣ Style the Testimonial Cards
- Add background colors to testimonial groups.
- Use border radius (e.g., 20px) for soft edges.
- Apply padding (20–30px) and subtle borders for a clean, professional look.
6️⃣ Duplicate & Adjust
- Once one testimonial card is done, duplicate it and adjust content for different testimonials.

Pro Tips
✅ Keep testimonials short and authentic — too much text overwhelms visitors.
✅ Always use SVG icons for sharp, scalable visuals.
✅ Ensure mobile responsiveness by testing layouts on different screen sizes.
Resources Mentioned in the Video
✅ Download SVG Support Plugin
✅ Gutenberg Block Editor Documentation
✅ Follow Riad Mahmud on YouTube
All Video: 10 days Gutenberg Challange
✅ Day 1: Mastering Gutenberg Group, Row, Stack & Grid Blocks for WordPress Layout
✅ Day 2: How to Create CTA in Gutenberg while exploring Row, Stack, Group & Cover block.
✅Day 3: How Gutenberg Grid works? Learn the Basic of Gutenberg Grid with Stack, Row, Group
✅ Day 4: How to Create a Custom Header & Menu using Gutenberg FSE Blockhttps://youtu.be/jwx9Aacp3so?si=Yli2iQDotqHASNO-
✅Day 5: Gutenberg Loop Builder Explained – Display Blog Posts | Custom posts with Ease
✅Day 6: Gutenberg Loop builder advance design Guide that you should know before using it!
✅Day 7: Gutenberg Bento Grid layout Learn the Advance Gutenberg grid
✅Day 8: Design a Testimonials section in Gutenberg Block
✅Day 9: Design Pricing Table using Gutenberg no additional plugin require
✅Day 10: Discover the POWER of Gutenberg Gradient Style with Grid Layouts
✅Bonus Day 11: Gutenberg Advance Gradient Border Master class

